SLK Blog
How to Setup and Use System Restore on Windows 10
We have all had that time when your Windows computer just had a hiccup or has shown an error screen. Luckily there is a System restore option that can sometimes come to the rescue. The only down fall to this is it must be setup before it can be used. Continue reading to see how you can setup System Restore to recover from some catastrophic errors.
As mentioned by default system restore is disabled on Windows 10. However; once you enable it and configure it to work correctly it can automatically create restore points or restore points can be created manually when installing a new program or hardware.
How to Enable System Restore
- Open Start
- Search for Create a restore point and Press Enter
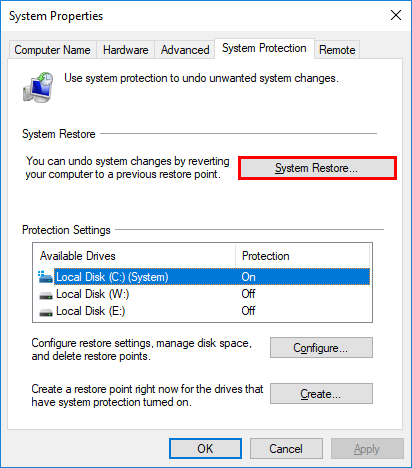
- Select System Protection Tab
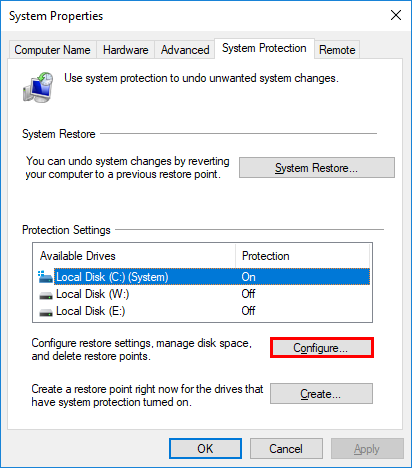
- Under “Protection Settings” Select the main system drive and click the Configure button.
- Select the Turn on system protection option.
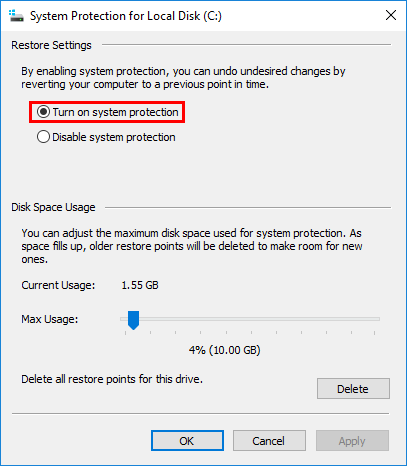
- Click Apply and then OK
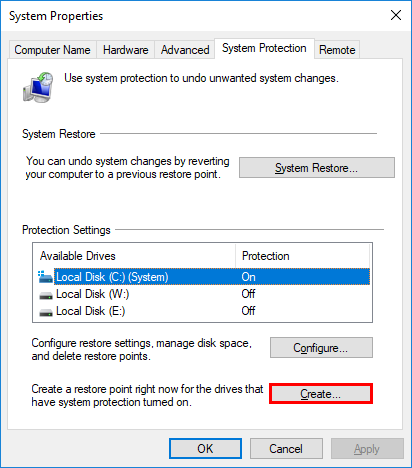
How to Create a Restore Point
- Open Start
- Search for Create a restore point and Press Enter
- Select System Protection Tab
- Enter in a description to identify the restore point created
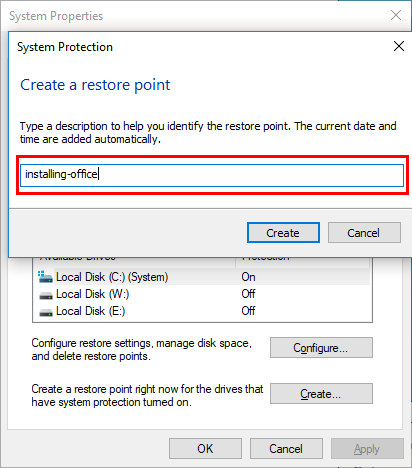
- Click Create
Once all steps are completed you will now have a way to restore your system to an earlier point. This is great when installing a new application or driver that might cause problems with your systems performance.
How to revert changes with System Restore
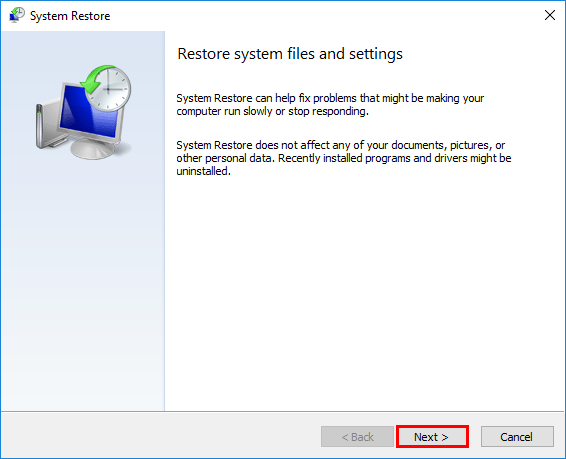
If you feel your system is not performing correctly after installing a new program or driver for new hardware, then the first place to start is reverting the changes via a System Restore.
- Open Start
- Search for Create a restore point and Press Enter
- Select System Protection Tab
- Click on Next
- Click on the most recent working restore point
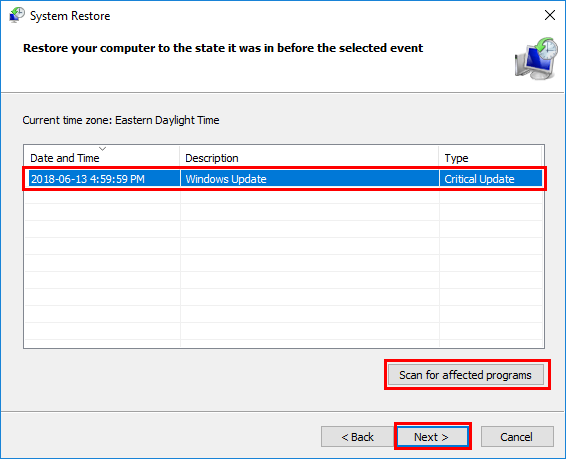
- Click on Scan for affected programs button to determine what applications will be either affected or removed
- Once you have reviewed the programs and drivers that will be either deleted or downgraded you can select Close
- Click Next
- Click Finish once you are ready to perform a System Restore
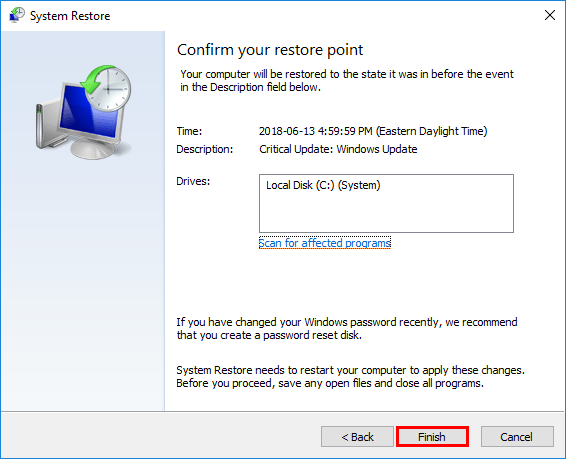
Your system will now revert all settings, programs installed and drivers back to an earlier date when everything was working correctly.
If you need help setting up system restore or if you are looking for a more advanced back-up solution please contact us or visit our website for a complete list of Managed Services Solutions.